A graphics card, also known as a video card or GPU (Graphics Processing Unit), is an essential component of a computer that is responsible for rendering images and videos. It plays a vital role in delivering smooth and high-quality graphics in video games, video editing software, and other applications that require heavy graphics processing.
However, graphics cards are prone to accumulating dust and other debris over time, which can cause performance issues and even damage to the card. Therefore, it is important to know how to clean graphics card regularly to ensure that it remains in good working condition.
In this article, we will provide you with a step-by-step guide on how to clean your graphics card properly. We will cover the materials needed, safety precautions to take, and the cleaning process itself. Additionally, we will discuss maintenance and preventative measures you can take to keep your graphics card clean and prevent future dust buildup.
By the end of this article, you will have a clear understanding of how to maintain your graphics card and extend its lifespan. Whether you’re a gamer or a professional video editor, keeping your graphics card clean is a critical component of keeping your computer running smoothly.
Preparing for Cleaning
Before you begin cleaning your graphics card, it’s important to take some necessary precautions to ensure your safety and prevent damage to your computer. Here’s what you need to do:
- Gather the necessary materials: To clean your graphics card, you’ll need a few items, including a can of compressed air, a microfiber cloth, isopropyl alcohol (70% or higher), and a screwdriver (if necessary to remove the card from the computer). You can find these items at most electronics stores or online retailers.
- Turn off your computer and unplug it from the power source: It’s important to turn off your computer and unplug it from the power source before removing the graphics card. This will prevent any electrical shock or damage to your computer.
- Ground yourself: Before touching any components of your computer, it’s important to ground yourself to prevent electrostatic discharge (ESD) from damaging your graphics card. You can do this by touching a metal object like the computer case or using an ESD wrist strap.
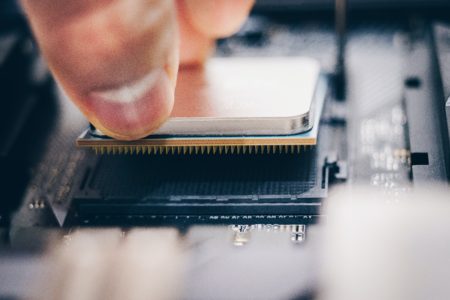
- Remove the graphics card: If your graphics card is easily accessible, you can simply remove it from the computer by unscrewing the bracket and gently pulling it out of the slot. However, if your graphics card is integrated into your motherboard, you should skip this step and move on to the next section.
- Inspect the card for damage: Before cleaning the graphics card, inspect it for any signs of damage or wear and tear. If you notice any visible damage or corrosion on the connectors, you should replace the graphics card instead of cleaning it.
By following these steps, you can ensure that you’re ready to safely clean your graphics card without causing any damage to your computer. Once you’ve prepared your materials and inspected your graphics card, you’re ready to move on to the cleaning process itself.
Cleaning the Graphics Card
Now that you’ve prepared your materials and inspected your graphics card, it’s time to start cleaning. Follow these steps to clean your graphics card effectively:
- Clean the fan and heatsink: Start by using the can of compressed air to blow out any dust or debris from the fan and heatsink. Hold the can upright and use short bursts of air to prevent the fan from spinning too quickly and causing damage. If necessary, you can use a microfiber cloth to wipe away any stubborn debris.
- Clean the circuit board and connectors: Next, use the microfiber cloth and isopropyl alcohol to clean the circuit board and connectors. Dampen the cloth with the alcohol and gently wipe down the circuit board, paying particular attention to any visible dust or debris. Be careful not to apply too much pressure, as this could damage the delicate components of the graphics card.
- Clean the connectors with a soft-bristled brush: If there is stubborn dirt or debris on the connectors, you can use a soft-bristled brush to gently scrub the connectors. Be sure to use a brush that is specifically designed for electronics to avoid causing damage.
- Allow the graphics card to dry: Once you’ve cleaned the graphics card, give it plenty of time to dry before reassembling it. It’s important to wait until the alcohol has evaporated completely before reinserting the graphics card into your computer.
- Reinsert the graphics card: Once the graphics card is completely dry, reinsert it into your computer and secure it in place with screws or brackets. Be sure to reconnect any power cables or connectors that you may have disconnected earlier.
By following these steps, you can effectively clean your graphics card and improve its performance. However, if you encounter any issues during the cleaning process, it’s important to stop and seek professional help to avoid causing further damage to your graphics card or computer.
Reassembling the Graphics Card
Now that you’ve finished cleaning your graphics card, it’s time to reassemble it and get it back into your computer. Follow these steps to ensure that you reassemble the card correctly:
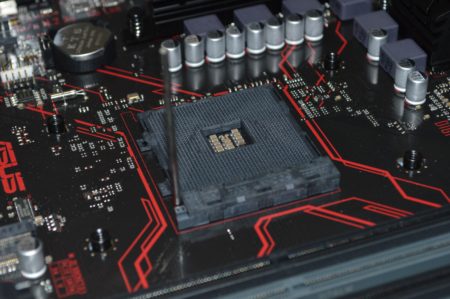
- Align the graphics card: Before inserting the graphics card into the slot, make sure it is correctly aligned with the slot on the motherboard. The slot is usually located on the bottom half of the motherboard, so make sure the graphics card is inserted into the correct slot.
- Secure the graphics card: Once you have aligned the graphics card, gently push it into the slot until it clicks into place. Then, secure the card in place with the screws or bracket that you removed earlier. Be careful not to overtighten the screws or bracket, as this could damage the card or the motherboard.
- Reconnect power cables and connectors: Once the graphics card is secured in place, reconnect any power cables or connectors that you may have disconnected earlier. Make sure that all cables are securely attached and in the correct location.
- Power on your computer: Finally, plug your computer back in and power it on. Check that your graphics card is working properly by running a benchmark or stress test. You should also check your computer’s temperature to ensure that it is not overheating.
By following these steps, you can reassemble your graphics card correctly and ensure that it is working properly. If you encounter any issues during the reassembly process or notice any problems with your graphics card after reassembling it, seek professional help to avoid causing further damage.
Testing the Graphics Card
After cleaning and reassembling your graphics card, it’s important to test it to make sure that it’s working properly. Here’s how to test your graphics card:
- Install the latest graphics card drivers: Before testing your graphics card, it’s important to make sure that you have the latest drivers installed. You can download and install the latest drivers from the manufacturer’s website.
- Run a benchmark test: To test the performance of your graphics card, you can run a benchmark test. There are several free benchmark tests available online, such as 3DMark or Unigine Heaven. These tests will push your graphics card to its limits and provide you with a score that you can use to compare against other graphics cards.
- Check your computer’s temperature: As your graphics card is running the benchmark test, check your computer’s temperature to ensure that it’s not overheating. You can use a software like HWMonitor or Core Temp to monitor the temperature of your CPU and graphics card. If your computer’s temperature is too high, you may need to adjust your fan settings or install additional cooling.
- Test your graphics card in games: Finally, you can test your graphics card in real-world scenarios by playing games that are known to be graphically demanding. This will give you an idea of how well your graphics card performs in actual use.
By following these steps, you can test your graphics card and ensure that it’s working properly after cleaning and reassembling it. If you notice any issues during testing, seek professional help to diagnose and fix the problem.
Maintenance and Preventative Measures
After cleaning and testing your graphics card, it’s important to take steps to maintain its performance and prevent future issues. Here are some maintenance and preventative measures you can take:
- Regularly clean your computer: One of the main causes of graphics card issues is dust and debris buildup inside your computer. To prevent this, it’s important to regularly clean your computer, including your graphics card, fans, and heatsinks. You can use a can of compressed air and a microfiber cloth to clean your computer.
- Monitor your computer’s temperature: High temperatures can damage your graphics card and reduce its lifespan. To prevent this, you should monitor your computer’s temperature regularly and make adjustments to your cooling system if necessary.
- Avoid overclocking: Overclocking your graphics card can increase its performance, but it can also cause damage to your card if done improperly. To prevent damage, avoid overclocking your graphics card or do it with caution and research beforehand.
- Update your drivers: Graphics card drivers are regularly updated by the manufacturer to improve performance and fix issues. Make sure to check for and install any available updates to keep your card running smoothly.
- Handle your graphics card with care: Graphics cards are delicate components, so it’s important to handle them with care. Avoid touching the circuit board or connectors directly, and be careful when inserting or removing the card from your computer.
By taking these maintenance and preventative measures, you can ensure that your graphics card performs well and lasts for a long time. If you notice any issues with your graphics card or computer, seek professional help to avoid causing further damage.
Conclusion
Cleaning your graphics card may seem daunting, but it’s an important task that can help maintain your computer’s performance and prevent future issues. By following the steps outlined in this article, you can safely and effectively learn how to clean graphics card and ensure that it’s working properly.
Remember to prepare your work area, remove the graphics card from your computer, and clean it using compressed air and a microfiber cloth. After cleaning, reassemble the card correctly and test it using benchmark tests and real-world scenarios. Finally, take steps to maintain your graphics card’s performance by regularly cleaning your computer, monitoring its temperature, updating drivers, and handling the card with care.
By taking these steps, you can ensure that your graphics card performs well and lasts for a long time, saving you money and preventing frustration down the line. If you encounter any issues during the cleaning or testing process, seek professional help to avoid causing further damage.
Frequently Asked Questions
Is it safe to clean a graphics card?
Yes, it is safe to clean a graphics card as long as you follow the correct procedures and use the appropriate tools. However, it’s important to be cautious and handle the card with care to avoid causing any damage.
How often should I clean my graphics card?
It’s recommended to clean your graphics card at least once every six months or more frequently if you notice any signs of dust buildup or decreased performance.
Can I use water to clean my graphics card?
No, you should not use water or any liquid to clean your graphics card as it can cause damage to the delicate components. Instead, use a can of compressed air and a microfiber cloth to clean the card.
Can cleaning my graphics card improve its performance?
Yes, cleaning your graphics card can improve its performance by removing dust and debris that can cause overheating and decrease performance. However, other factors such as outdated drivers or hardware limitations can also affect performance.